May 03 @ SAT : Let's Design a Room in a Shoebox
Duration: 3 hours
Time: 10am - 1pm
Location: SAT
Facilitators: Priyanka, Sahil, Anam, Laura
Illustrations by: Irushi Tennekoon
Youtube Link (Also on Slide 3 below) https://www.youtube.com/watch?v=SSRprD3pi7s&t=70s
-
Lesson Objectives
By the end of this workshop, students will have:
Practiced designing for someone other than themselves
Understood scale and proportion as tools in service of a design problem
Developed a character through empathy and imagination
Made decisions about space, materials and composition based on a person's needs and personality
Experienced the full design process — from brief to sketch to built model
You will need:
For Settle in and Warm up activities:
Name tags
Printed handout (link to PDF)
sketch book / and felt pens
Basic Stationery: Paper and pencil for rough sketches and ideas, ruler to measure, felt pens to draw
Various measuring tools: pencils, water bottles, paper clips, bricks, a ruler, measuring tape and string,
For Main Activity:
A printed assortment of the below character prompts, so one child gets one character card. (link to PDF)
Blank Character cards in case kids want to invent their own character (link to PDF- page 2)
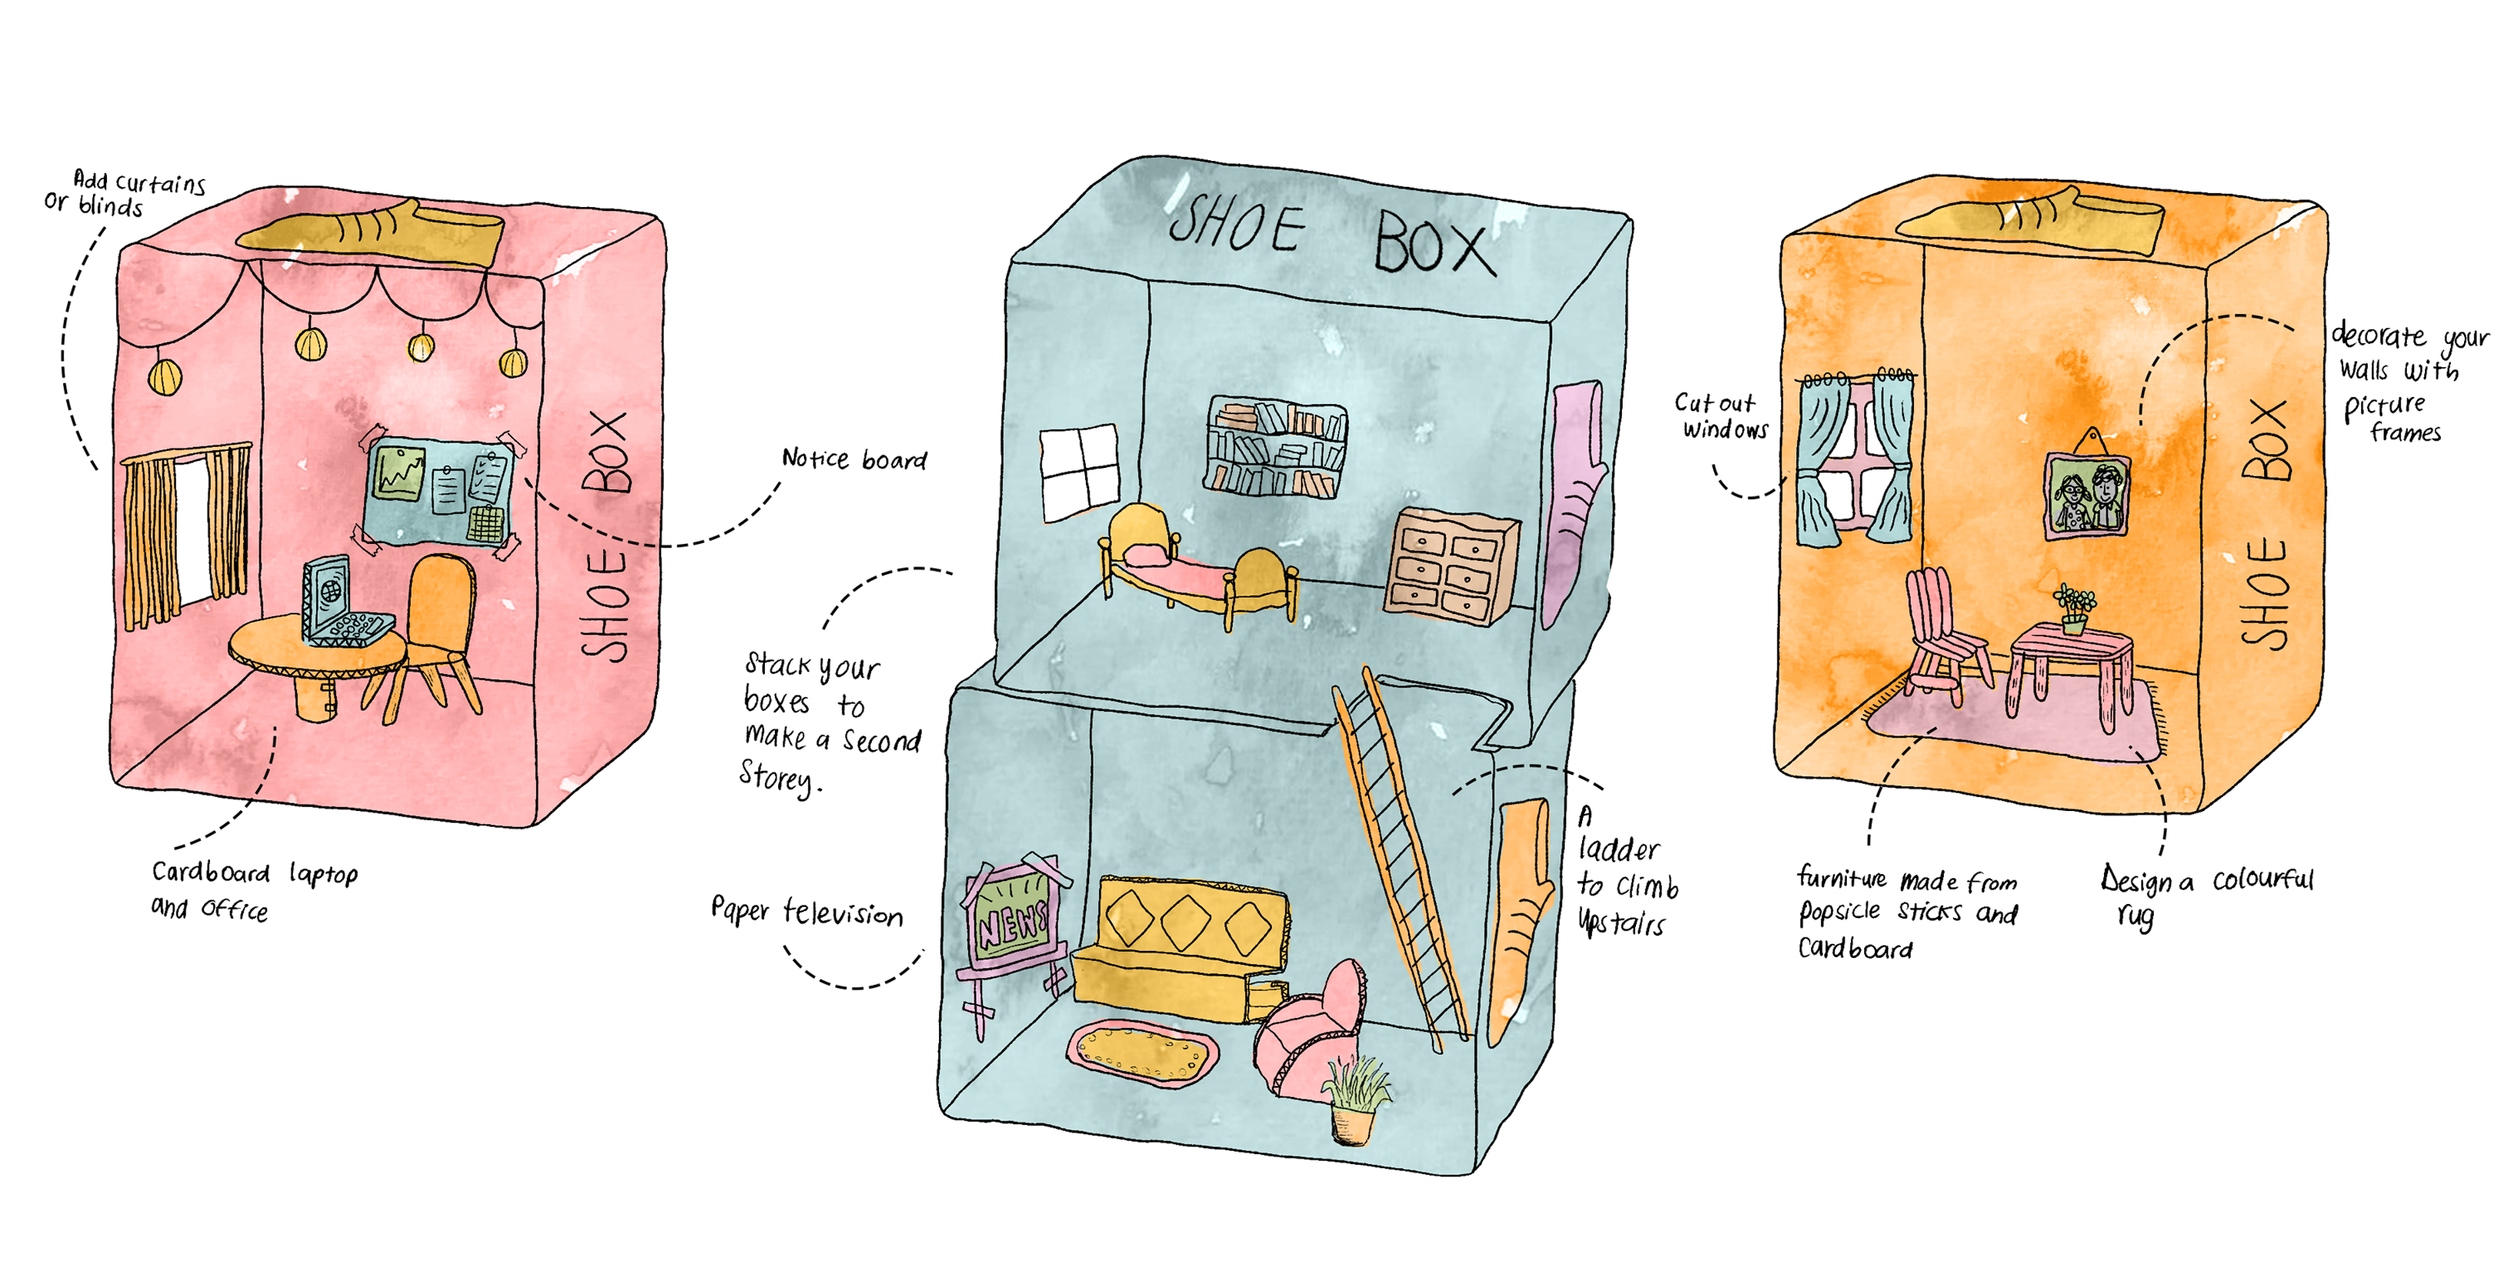
A shoebox or a similar sized cardboard box, 1 per student (you can ask students to bring as well)
Basic Stationery: Paper and pencil for rough sketches and ideas, ruler to measure, felt pens to draw
Craft Materials: Colored a4 paper or scraps, Cardboard Scissors, cello tape/masking tape and Glue
Lata pata: egg cartons, Little sticks, iratu, popsicle sticks, ribbons, crepe paper, sand, recycled material and cloth, string, branches of trees to represent plants
Workshop
Settling in (optional)
While students are waiting to settle in, they can fill this page out:
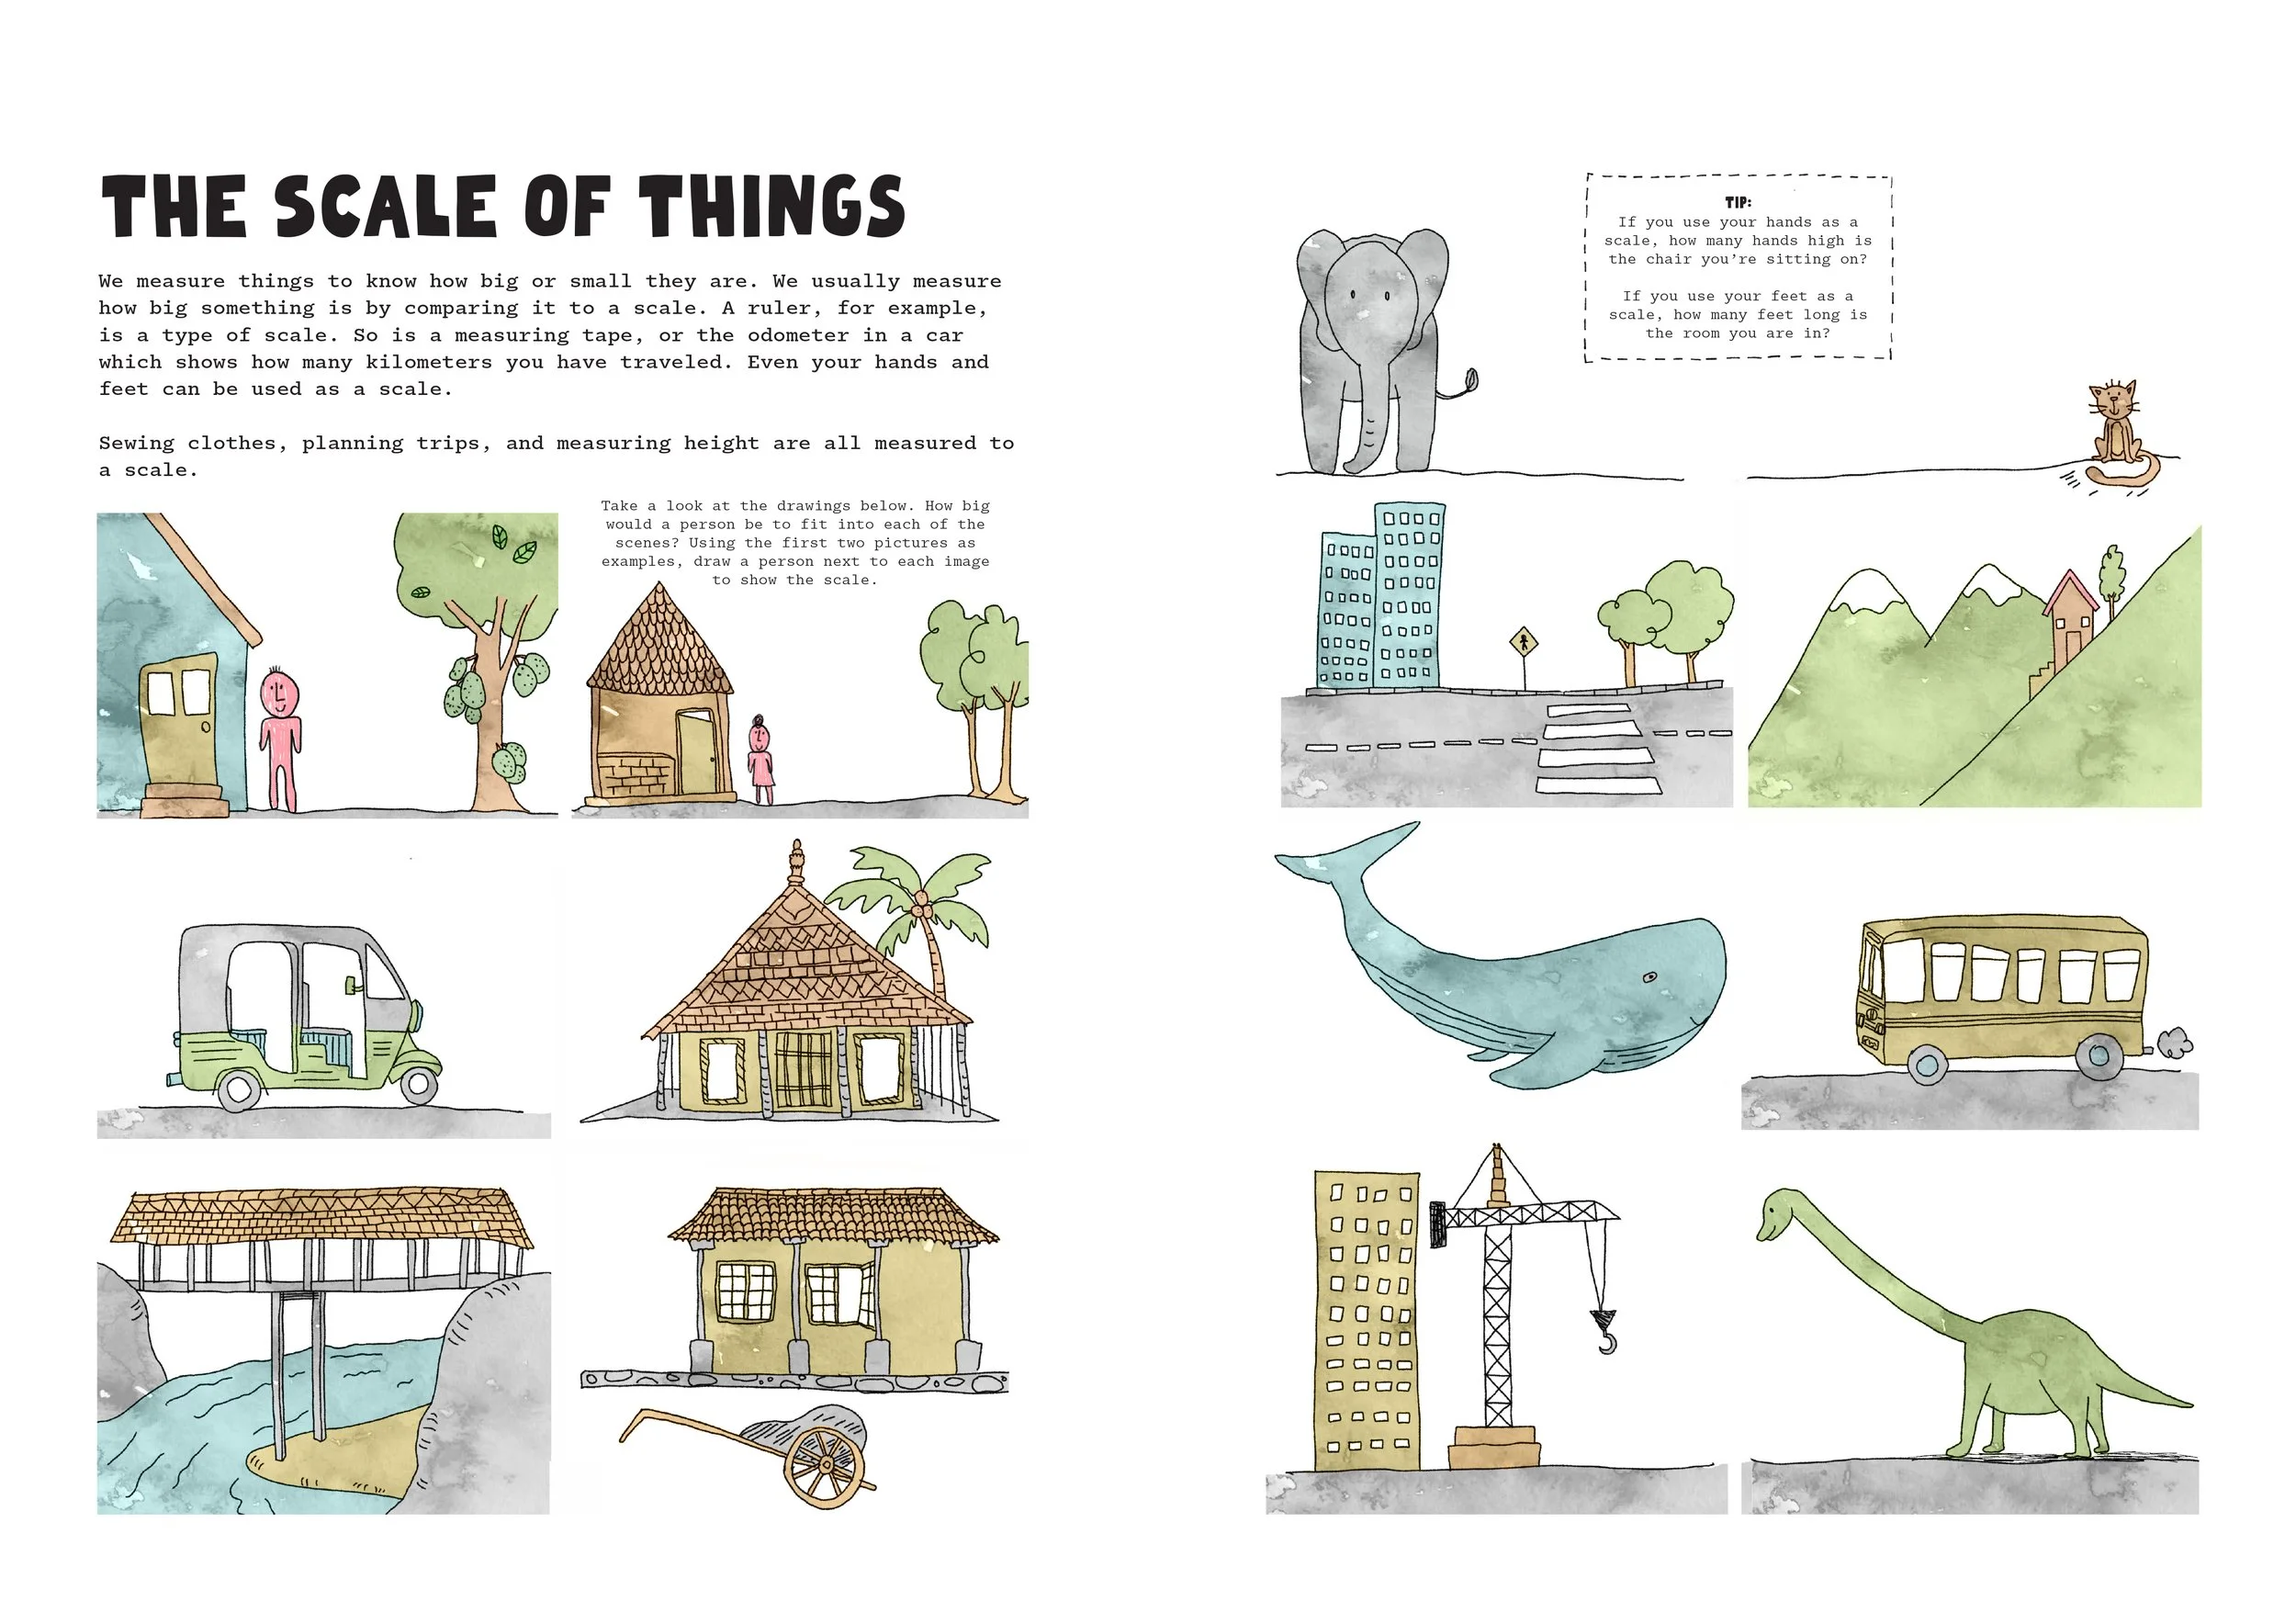
Look at these pictures. (the below image should be made available as a printed handout) How big is a person next to this house? Or this elephant? Or this cat? Or even an ant? Draw a stick figure next to it to demonstrate how big or small the image next to it is.
Program Summary:
Our challenge today is to build a miniature room for a unique personality that isn't you. This project requires you to really understand your character and build for them — so you will put yourself in their shoes. We will start with a small exercise learning about scale and proportion, and then move on to the main activity.
Scale exercise (20 mins):
Why do we measure?
How do we measure?
Describing sizes by comparing it with something else is one way of measuring things. Scale is the relative size of one thing when compared to another. This understanding of scale is one of the first lessons in architecture and design. Let’s pair into teams, and measure each other and the length of this room using various measuring tools.
Part 1: Measuring
Pair up in teams of two. Each student gets assigned one measuring tool from the following list: Hands, feet, pencils, water bottles, paper clips, bricks, a ruler, measuring tape and string. Measure the room and measure your friend using one or two of these tools.
Compare answers. Why were they different?
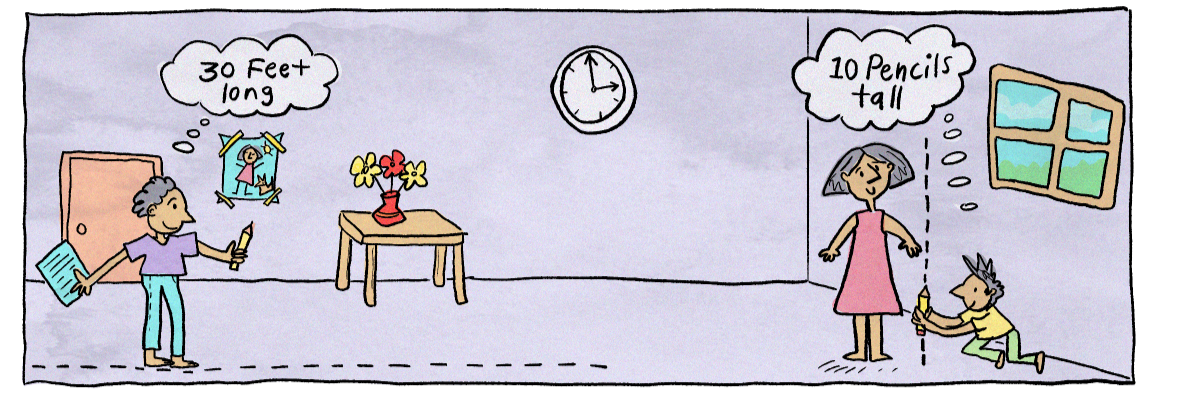
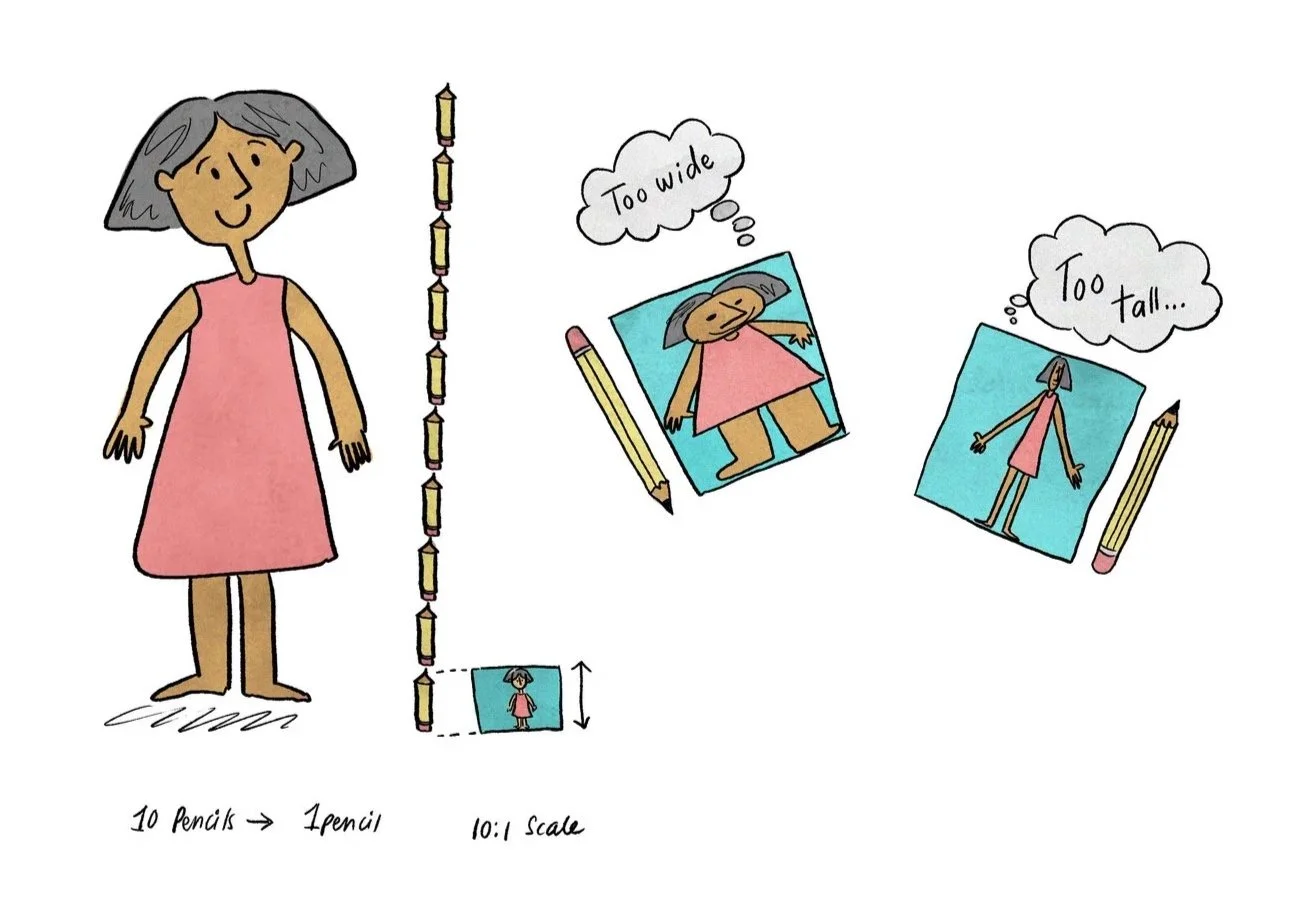
Part 2: Drawing to smaller scale
Grab your sketchbook or paper. If you measured your friend using pencils, draw them only one pencil tall. If you measured your friend using hands, draw your friend on a piece of paper so they are just one hand tall.
Try to get all the proportions light, your friend should not be squashed or stretched!
If there’s time, you can draw some other elements from the room next to them.
Break
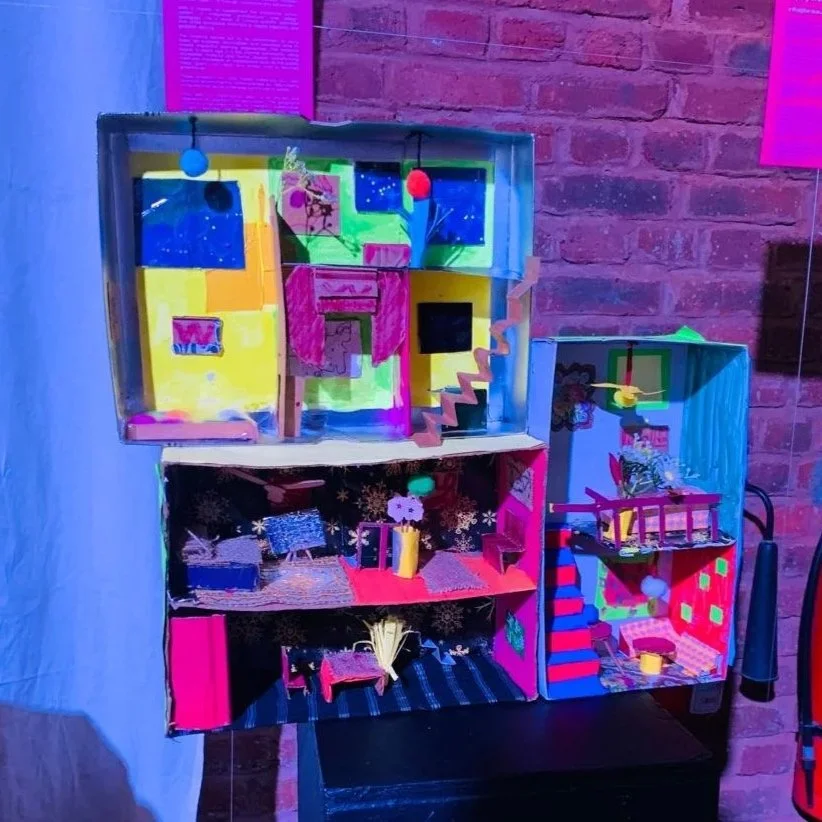
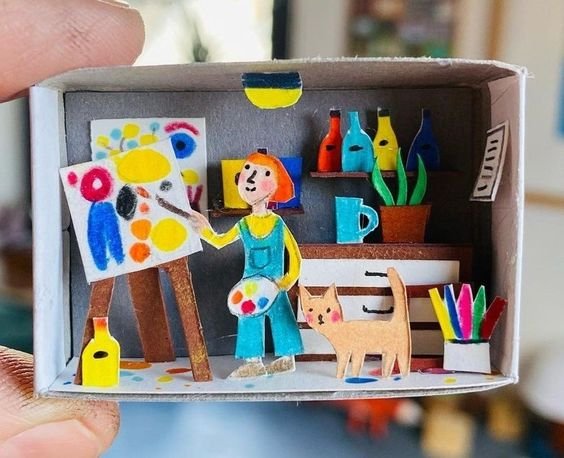
Main Activity: Design a Room inside of a shoebox (1.5 hour)
Guide
Step 1: Ask: "have you ever walked into a room and immediately known something about the person who lives there?"
Potential follow up: “What did you notice and what character traits did it reveal?”
Step 2: Distribute character cards among students so there is one card per student. Ask them to think about the person they hope to build a room for. What about their personality, likes and dislikes can you represent in their space? Where do they like to live, and would you see that from their window?


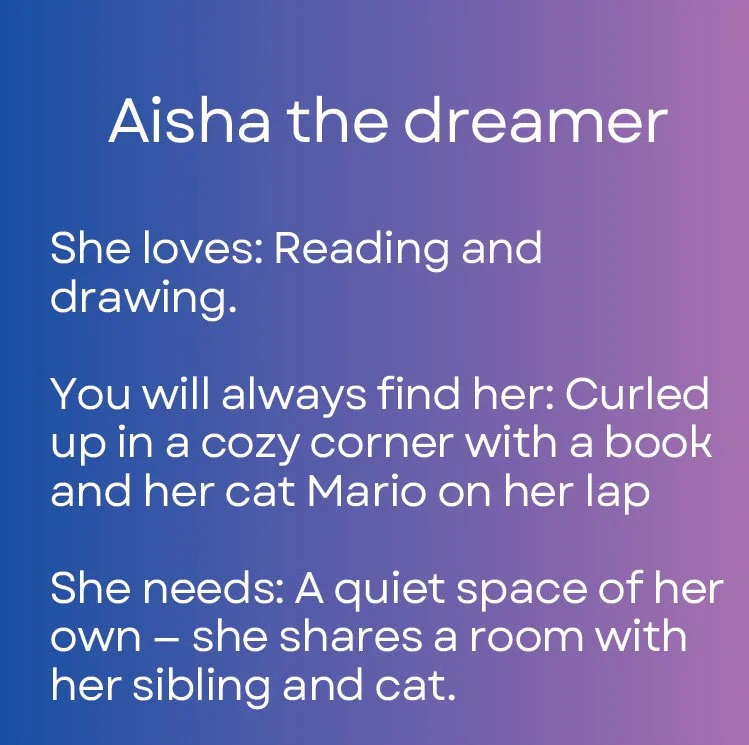

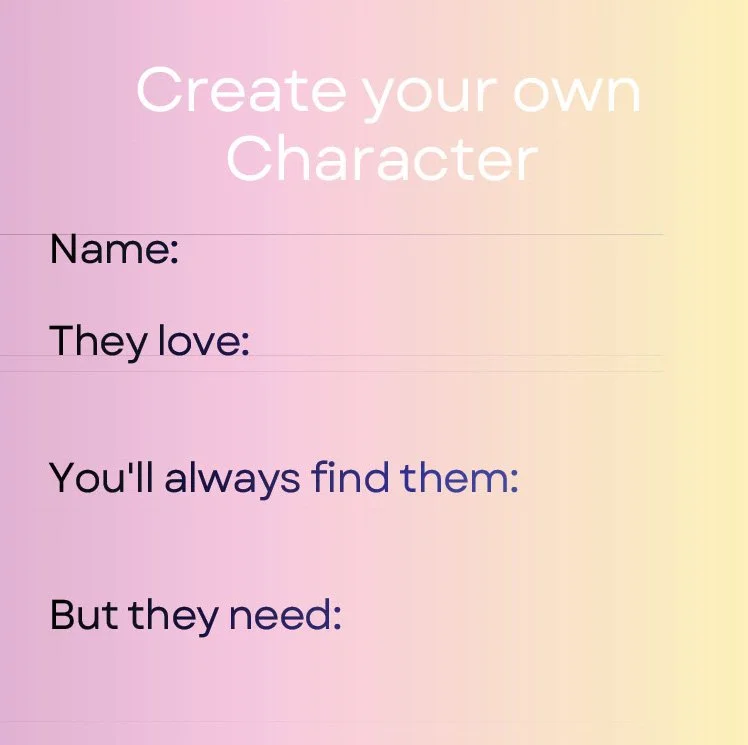
If students wish to create their own character, or make a space for someone they know, they are welcome to do so, using a blank card like this:
If you were making a room for someone with magic powers, or a musician, would you would make the space differently?
Step 3 - 5 minute sketch: Make a rough sketch of what you’d like to include in their room.
Step 4 (Music plays): Start building! Cut out windows, add furniture, walls, curtains, plants, carpets, art, a fish-tank, another level with stairs, anything you wish. You may also draw and cut out a small scale figure of your character. What height should they be?

Conclusion:
At the end of the class, arrange all your boxes on top of each other to create a little terrace house. discuss 1-3 questions:
How different is your room from your first sketch — and did the sketch help or get in the way?
What would you do differently if you started again knowing what you know now?
If your character was born 50 years in the future, how would your room design change?