
May 19 Onw: Let’s Build Street furniture at the Children’s Center
Duration: 1 hour 15 min
Step 1: Introduction (5 minutes)
Introduction of the class: What is street furniture? Do the kids know any type of street furniture?
Discussion on the Importance of Street Furniture in Urban Spaces
Explanation of the Topic: We are going to create Street Furniture at Hope Center. This week we will look for suitable locations and create a design.

Materials:
Art supplies:
Cardboard
Paper
Crayons
Watercolor
Fabric leftovers
sand/soil/leaves/twigs
Clay
Oil paper
Any material is allowed, to represent the design in a model (TO SCALE!!)
Step 2: Visualization and Observation (10 minutes)
Guided Visualization Exercise: Walk around in the urban space of Hope Center. What do you see, analyze the space for its usage with different areas for different usage. Make rough sketches. How do people move around? How do spaces connect/are connected? What is happening in those spaces? Take a walk around the Children’s center and identify good locations for street furniture. Where would it be and why?
Observation Exercise: Look at pictures of different street furniture designs and get inspired. Discuss the purpose of each piece and how it enhances urban spaces.
Brainstorming: Encourage kids to discuss and visualize their ideal piece of street furniture for the Hope Center. Collect general ideas from all kids. In step 3 Teams are created and general ideas will be worked out further to individual Team designs.
Step 3: Making and Problem-Solving (45 minutes)
Build Teams of 3 kids (different age groups) to work together
Design Session: Each team begins sketching and planning their street furniture designs, considering factors discussed in step 2 and now looking further into location, users, purpose, and usage conditions.(see definition for volunteers below)
Problem-Solving: Encourage teams to anticipate potential challenges or limitations in their designs and brainstorm solutions.
Ensure kids are thinking in real dimensions/scale, as this is to be built in the future at the Hope Center
Step 4: Community Building (10 minutes)
Presentation: Each team presents their street furniture design to the class, explaining their concept and design choices (including color choices materials, function, placement etc.).
Peer Feedback: Other teams offer constructive feedback and suggestions for improvement.
Collaboration: Encourage teams to collaborate and exchange ideas with each other.
Step 5: Conclusion and Reflection (5 minutes)
Recap: Summarize key points discussed during the class.
Reflection: Ask each team to reflect on their design process. What did they learn? What would they do differently next time?
Closing Remarks: Emphasize the importance of creativity, teamwork, and community engagement in urban design.
For volunteers: Definition of street furniture - Intro:
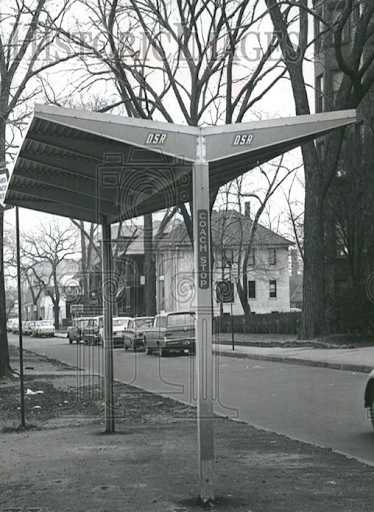
HISTORIC STREET FURNITURE - SEE IMAGES BELOW


CRITERIA FOR DESIGN
FUNCTION
SITING AND LAYOUT
FORM / APPEARANCE
DURABILITY
COST
STREET FURNITURE - PLACEMENT
PARKS, GREEN SPACE
STREET/SIDEWALK
PLAZA
WATERFRONT/RIVER
RECREATIONAL AREA
MALL
STRATEGIC LOCATIONSPLACEMENT BASED ON:
FUNCTION
COHERENT DESIGN
INTEGRATION
ACCESSIBILITY
INTENT OF STREET FURNITURE
SHAPING SPACE
CREATING IDENTITY
SOCIAL IMPORTANCE
SAFETY
PUBLIC USE
DESIGNING STREET FURNITURE
ANALYSIS OF SPACE
USER GROUP
AIM – PURPOSE
CONDITIONS OF USE
CONTEMPORARY STREET FURNITURE -


